What you’ll need:
– 1 box of Cake mix (any flavor)
(And everything to bake it according to box)
– 1 can of frosting (any flavor)
– Large bowl
– Cookie sheet
– Parchment paper
– 1 Tbsp Cookie Scoop (optional)
– Small deep bowl
– Candy Melts or Almond Bark
(Candy Melts can be found at Michael’s,
Almond Bark can be found at grocery store)
– Spoon
– Vegetable shortening (Crisco)
– Lollipop sticks (can be found at Michael’s)
– Small shallow bowl
– Sprinkles (optional)
– Styrofoam base (can be found at Michael’s in the floral department) (Pre-punch holes into the Styrofoam that are big enough to fit the lollipop stick)
– Plastic wrappers (can be found at Michael’s)
– Ribbon
Let’s get started…
Step 1
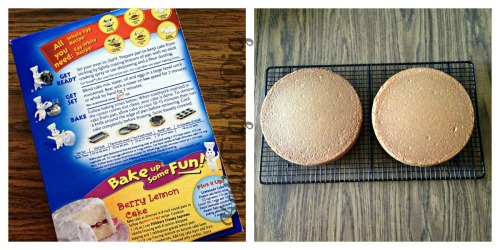
Bake cake as instructed on box and let cool. Cool times will vary based on size of cake made (I usually make two eight inch round cakes but any size will work).
Step 2
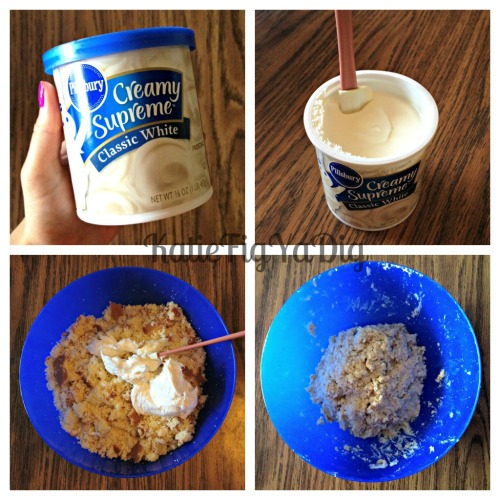
Once COMPLETELY cooled crumble entire cake (both 8 inch rounds) into the large bowl. I like to take off the sides of the cake first if they’re a little stiff because they won’t crumble well.
Step 3
Spoon ½ to ¾ of the canned frosting into the crumbled cake and mix it in until it’s about the consistency of Play-Doh. You can mix either with a spoon or your clean hands. I use my hands because it’s faster. (Use ½ the can of frosting to start because this step is crucial. If you add too much it won’t hold the round shape and if you don’t add enough it’ll fall apart. You can always add in more if needed)
Step 4
Now that all the frosting is mixed into your cake place the large bowl into the fridge for 45-60 minutes (or in the freezer for about 15 minutes but DO NOT let the mixture freeze completely). While it’s setting line your cookie sheet with parchment paper.
Step 5
After at least 45 minutes in the fridge take the frosting-cake mixture out and form it into approximately 1 inch balls then place onto your lined cookie sheet. I use a 1 Tbsp cookie scoop to help form evenly sized cake balls but if you don’t have one your hands will work just fine.
There is no telling exactly how many this will yield. It all depends on the size of balls you make. For this tutorial I was able to make 28 cake balls.
Step 6
After making all your balls place cookie sheet back in the fridge for another 45-60 minutes (or the freezer for about 10-15 minutes but DO NOT let them freeze completely).
Step 7
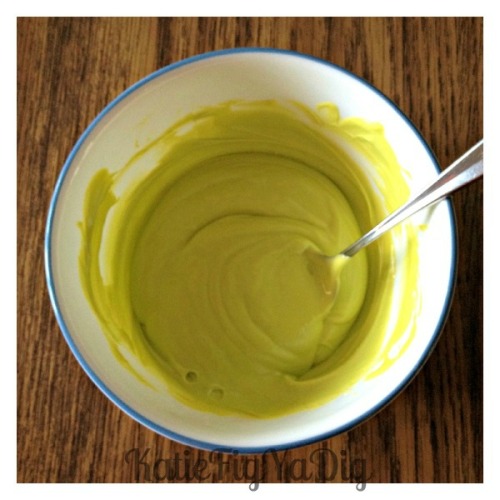
When time is nearing the end of the 45-60 minutes you can start getting your chocolate ready. Pour about ¾ of the bag of Candy Melts (or chunks of Almond Bark) into the small deep bowl and microwave for 60 seconds (to start) then remove and stir. Continue stirring until all of the chocolate is melted together. Once you’ve stirred for around a minute you may notice that your chocolate needs more time but don’t worry about it for now. We’ll address that in step 9.
Step 8
Take cake balls out of fridge. Dip your lollipop stick about half an inch into the chocolate. Insert the dipped stick half way into the cake ball then place back onto cookie sheet to allow the chocolate to set up. This ensures the cake ball will stay on the stick during the dipping process. After all the lollipop sticks are in the cake balls put back into fridge for about a minute or two.
Step 9
If all of your chocolate isn’t melted together yet continue the microwaving process at 30 second intervals (30 seconds in then remove and stir) until all the chocolate is completely melted (my chocolate usually takes about 90 seconds total but the amount of time will differ based on the power of your microwave).
Step 10
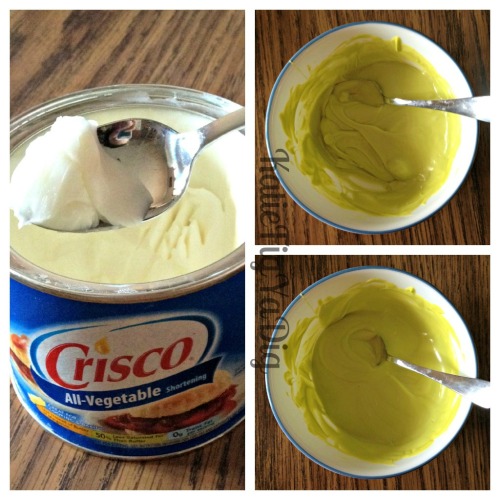
Once all your chocolate is melted and you’ve inserted the lollipop sticks into your cake balls you will want to add some vegetable shortening (NEVER WATER) to the remaining chocolate in order to thin out it out a bit more (this makes the dipping process easier to manage). Only add a little vegetable shortening at a time because you don’t want your chocolate to become too runny (usually around half a teaspoon does the trick for me). At first it may look like the vegetable shortening isn’t melting completely, but just keep stirring and I promise it’ll all mix in eventually.
Step 11
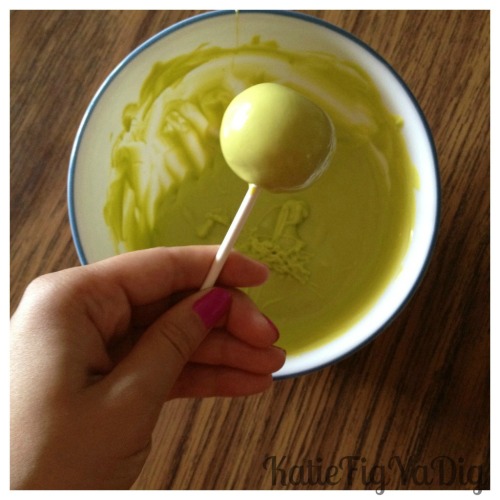
Now that your chocolate is thinned out you can take your cake pops out of the fridge and start dipping. I find it easiest to dip the cake pop straight down and out of the chocolate (you can move the cake pop SLIGHTLY but moving it too much will cause the cake to crumble into the chocolate and it’ll be a mess for the rest of the cake pops). Go directly to step 11.5 and 12 before continuing on with the rest.
Step 11.5
Once the entire cake pop is covered in chocolate let the excess chocolate run off (this should take about 30 seconds or so). You may want to use both hands for this step; use one hand to hold the stick (like pictured) and the other hand to gently tap your wrist (or fingers, which is what I do). Vibrations from the tapping will help move the excess chocolate along faster than just holding the stick still over the bowl.
Step 12
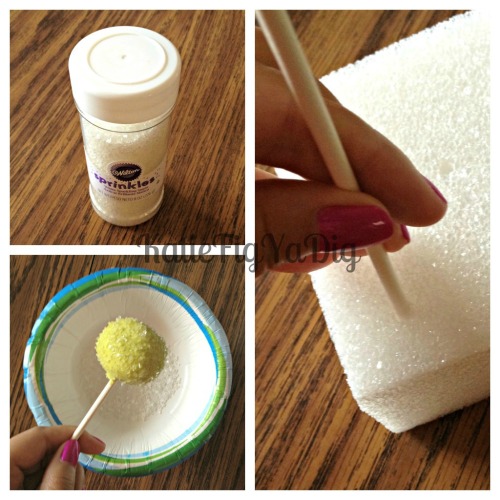
Immediately after finishing step 11.5 you’ll want to sprinkle with or pat (I found rolling became too messy) the chocolate covered cake pop in the sprinkles before the chocolate hardens. Do this using the small shallow bowl. Once coated with sprinkles place the cake pop stick into the Styrofoam base to set.
Repeat steps 11-12 until desired amount of cake pops are finished (if you do not want sprinkles on your cake pops skip the beginning of step 12).
Step 13
Once all of the cake pops have been dipped, sprinkled, set into the Styrofoam and given time to harden you can start wrapping. Place plastic wrapper over the cake pop and tie the bottom closed with a piece of ribbon.
Do that to all of them and you’re done!
Oh wait, one more step…
Step 14
Bring left over cake pops to the kids you nanny and be declared the best nanny of all time!
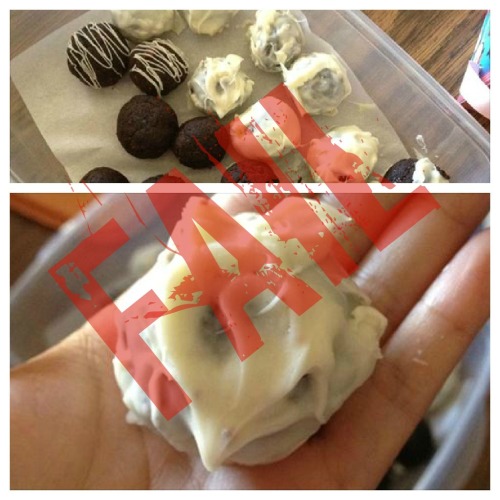
I hope you found this tutorial helpful. I wanted to put together an easy tutorial because I wished I had known some of these tricks when I first attempted to make cake pops. Below is a picture of my first experience with cake balls/pops from a few months ago.
Go ahead and laugh… it’s Monday so I’m sure you need it!
Luckily I have gotten sooo much better since then and am getting even better each time I practice. Have you ever attempted to make cake pops? If so, do you have any funny stories or tricks you’d like to share? Leave a comment on this post.
– Katie
Give my tutorial a try? Leave a comment. I’d love to hear whether or not it worked out for you.


